With every webpage loaded, email sent, or video streamed, network traffic takes a complex journey…
Exoprise recently released support for Security Assertion Markup Language (SAML) 2.0 integration to enable CloudReady Single Sign-On (SSO) for user access to CloudReady. Exoprise always supported testing and monitoring web-based SSO like ADFS, Ping, & Okta but had not gotten around to finishing our integrated SAML support – well wait no longer – its here! No more letting users manage passwords in CloudReady unless you want to.
Here’s an overview of the SAML configuration setup. Currently, we support SAML integration for all CloudReady plans though this may change in the future.
Multiple Configurations
First, a couple of highlights about the CloudReady SAML integration for this first release:
- Its optional and not required. If you want to test it during the trial, that’s fine but not required. You can continue to use regular CloudReady managed accounts and invitations.
- Multiple configurations for a tenant are supported. This is great for migrating to a different Identity Provider (IdP) or for testing out different automatic provisioning settings.
- On-demand provisioning using SAML 2.0 assertions is supported. Or you can require an invitation for access too, and the invitations and CloudReady roles are managed the same way regular (managed) invites are.
SAML Configurations can be accessed by any Organization administrator via the Admin -> Settings -> SAML Setup page.
Creating a Configuration
To get started creating a SAML CloudReady configuration, follow these steps:
- Identify which Identity Provider you’ll use for signing into CloudReady. We have customers successfully using Microsoft Active Directory Federation Services, Okta, OneLogin, Azure AD and Ping Identity. We’re not going to cover all the setup steps for all them here – we’ll cover some high-level details for ADFS.
- Configure the SAML configuration in CloudReady
- Configure the IdP for signing into CloudReady and verify that the auto-provisioning, roles and invite mechanisms are working correctly.
- When your done, users attempting to access Exoprise CloudReady will be authenticated through the SSO system.
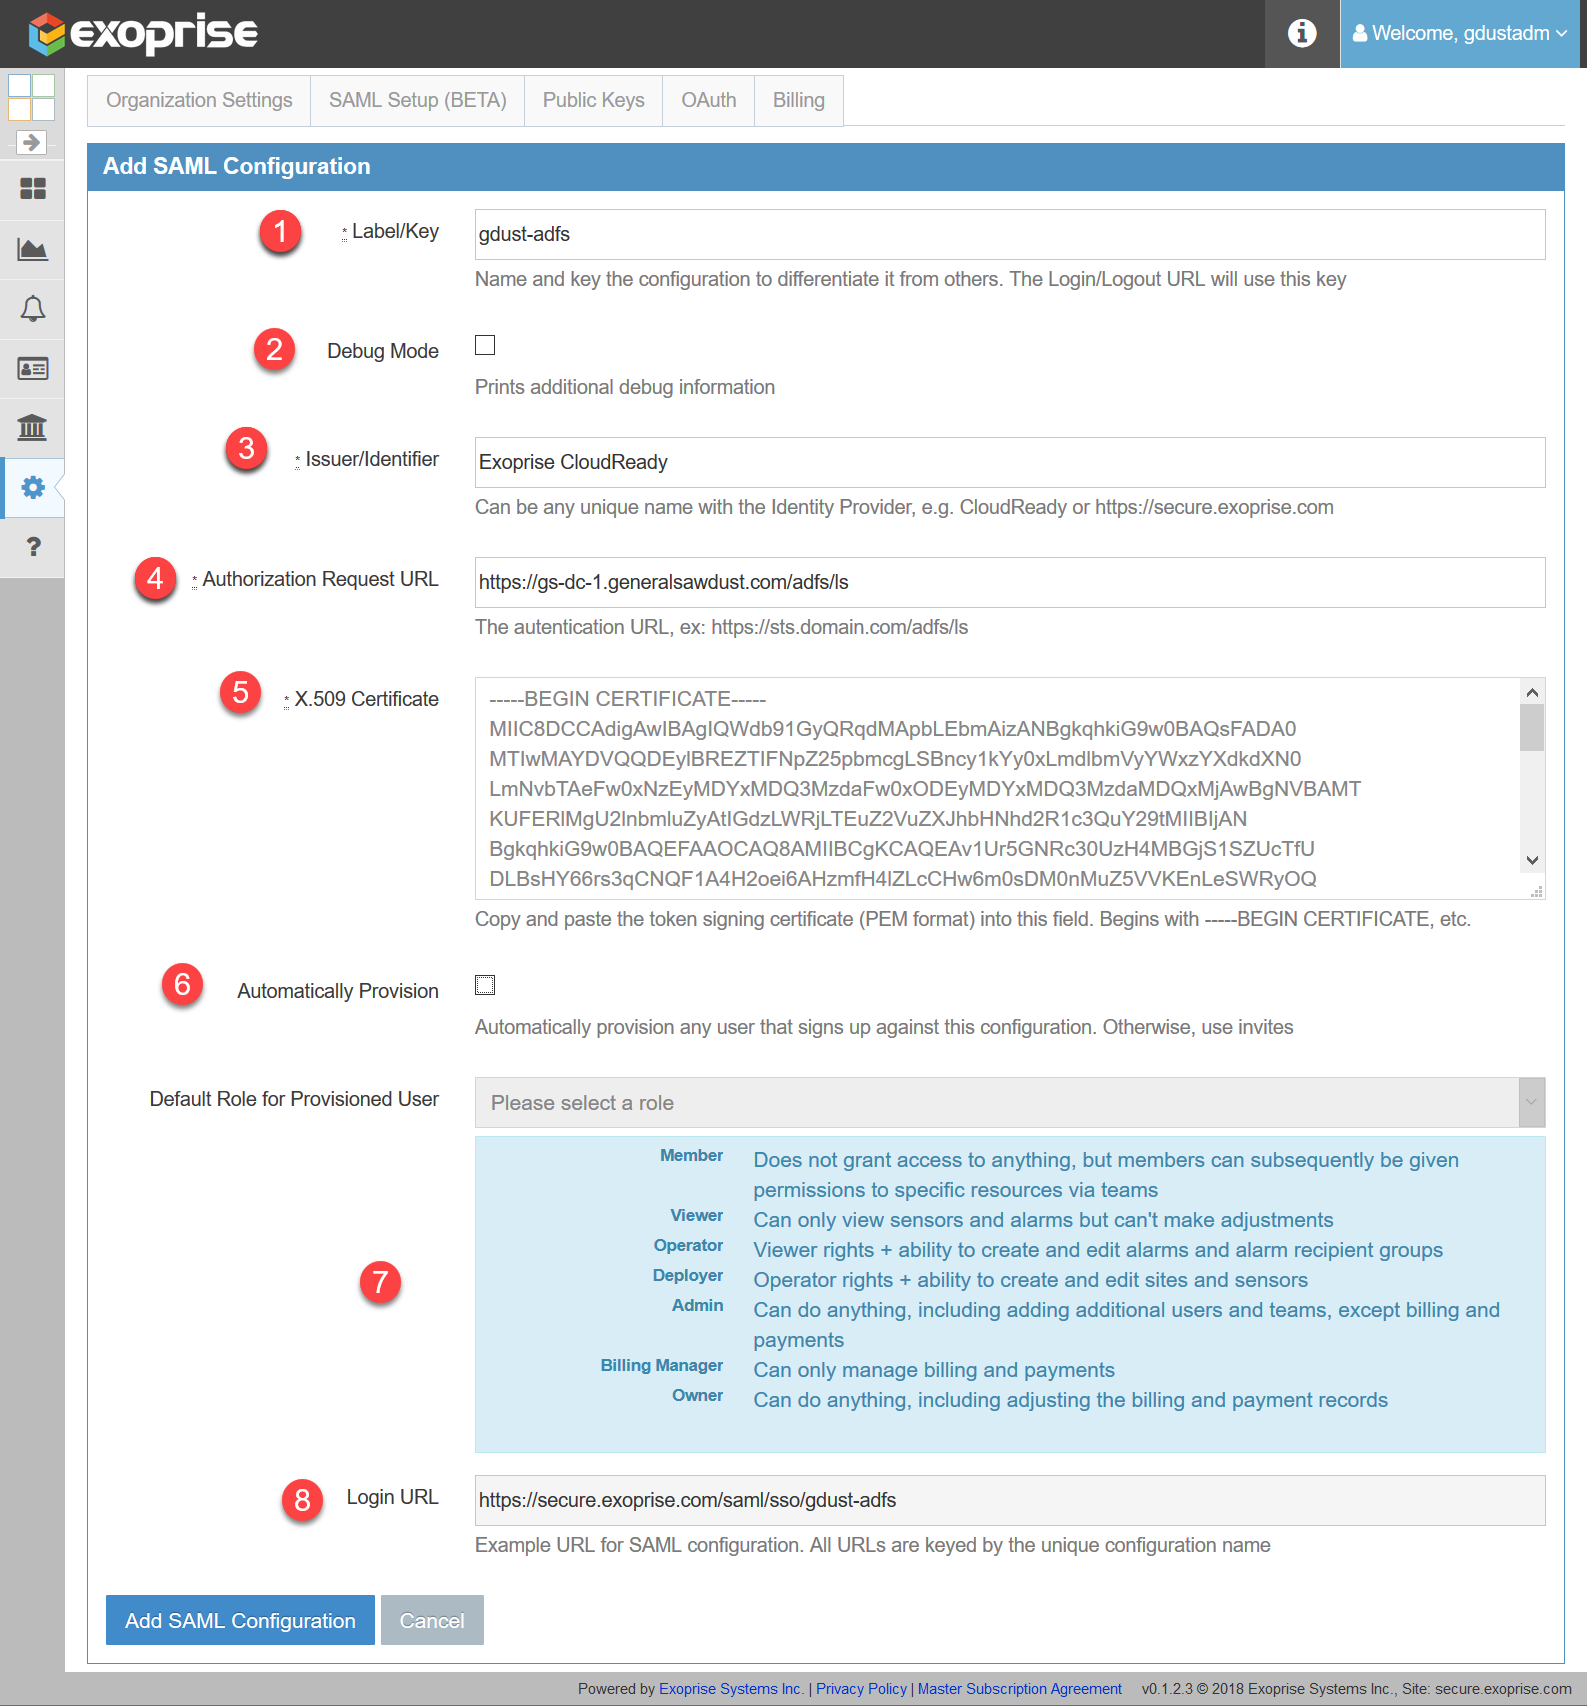
To create a configuration, use any browser and go the SAML Setup page and click ‘Add SAML Configuration’. Here’s a screenshot to follow along with (you can open it in a separate window for easier reference):
Add CloudReady SAML Configuration
 Click to open in a new window...
- The URLs for a SAML configuration that your Identity Provider will redirect, query and monitor are keyed off of the label and it must be unique within the system. The Login URL (in the last step) will update dynamically as you change the label (in Step 1). This enables you to create different labeled SAML configurations.
- You can optionally enable Debug mode for the SAML configuration and additional debug information will be presented during a sign-in and, optional, provision. Use this while you are setting up and debugging a new SAML configuration.
- The issuer identifier is how the CloudReady app is registered on your chosen IdP. Typically, this will be required to be unique on the Provider so if multiple configurations are used with the same IdP this, too, will need to be unique.
- For Service Provider initiated requests (from CloudReady) enter the Authorization Request URL. For example, here, we have put in an ADFS browser endpoint URL.
- For the X.509 Token Signing Certificate, you’ll have to retrieve it from your Identity Provider. Currently, we are expecting a full PEM format file, include the certificate beginning and ending signatures (—–BEGIN all the way to —–END CERTIFICATE—–). We may add support for certificate thumbprints at some point in the future.
- Optionally, you can automatically provision a new user from an IdP initiated sign up. If you don’t automatically provision new users, then you will need to send invites from the User Management page (Admin -> Users) . With invites you can choose whichever SAML configurations you’ve created, this can be helpful if you’re managing multiple forests or different tenants.
- If you select to automatically provision users, then you’ll need to choose a Role within CloudReady. If you choose Member as the role then the user, after they sign up, won’t have any rights but you can adjust it from the user management page. Otherwise choose a role with rights.
- Finally, click Add SAML Configuration at the bottom of the setup page.
Whew, that’s it for the CloudReady side. Now we will move on to show setup steps for the Identity Provider side.
Connecting Up the Identity Provider
Now that you’ve setup a SAML configuration at CloudReady, you need to connect the configuration to your Identity Provider. For this example, we’re using ADFS but the steps are somewhat similar for Azure AD, Okta and other providers. You should already be signed in to get started.
Open the ADFS Management Application, select the Relying Trusts Folder, and select Actions > Add a new Standard Relying Party Trust to open the wizard. Click Start. With ADFS, and other IdPs, you can try and import from the meta-data URL that CloudReady produces for each configuration, or you can manually supply the values. We’ll go over both methods here:
Metadata URL
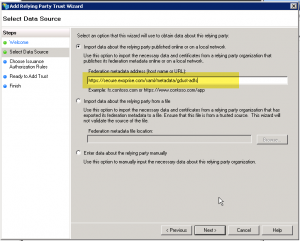
To use the metadata URL, select the first option, ‘Import about data about…’ and enter the meta-data URL that includes the keyed configuration that you set up. Here’s some screenshots to assist in figuring it out:
If you use the Metadata import from the CloudReady that should be it. That’s all you need to do and, depending on your default claims rules, end-users should be able to sign-in automatically or be invited to CloudReady. If you have different claims rules, then read on further for how you can manually configure a Rely Party Trust.
Entering Rely Party Trust Data Manually
If you have different claims rules or have a different type of IdP, you may want to read these instructions where we walk through the manual creation of a Rely Party Trust
- As in the previous metadata URL step, Open the ADFS Management Application, select the Rely Trusts Folder, and select Actions > Add a new Standard Relying Party Trust to open the wizard. Click Start.
- In the Select Data Source window, select the 3rd option, select Enter Data About the Party Manually and click Next
- In the Specify Display Name window, enter a Display Name and (optional) notes, for example ‘Exoprise CloudReady’. Click Next.
- In the Choose Issuance Authorization Rules dialog, choose whether you want to permit or deny access. For these setup purposes where you have invite capability and auto-provisioning, we recommend that you choose ‘Permit all users to access this relying party’.
- In the following ‘Ready to Add Trust’ you can review the different options before adding finalizing the trust.
- Depending on how your ADFS system is configured, you should check the box to Edit Claims Rules dialog at the end
Edit Claims Rules and Transforms
- From the Edit Claims Rules for CloudReady, Click ‘Add Rule…’
- Start with the ‘Send LDAP Attributes as Claims’, click Next
- Name the claims rule ‘LDAP Email’, you want to supply your standard LDAP attributes to CloudReady for auto-provisioning and creating users. At a minimum, you will need to supply the email address otherwise we have no way of communicating with the user. You can also supply their Given-Name and Surname to improve the communications. See the screenshot for further guidance.
- Click finish once you’ve assigned your attributes
- Next, we’re going to add a Transform claims rule. Click ‘Add Rule…’, then select ‘Transform an Incoming Claim’.
- For Claim Rule Name, enter ‘Email Transform’.
- For the Incoming claim type, choose ‘E-Mail Address’ and for Outgoing claim type choose ‘Name ID’. This is a common transformation for supplying email identities for SaaS Providers (SPs). Finish up with the ‘Outgoing name ID format:’, Email. Finally, choose ‘Pass through all claim values’ and choose ‘Finish’.
You should be ready to test the SAML / Single Sign-On configuration.
Testing Your Single Sign-In
To test the SAML configuration navigate to the keyed Login URL for the configuration, it should be something like https://secure.exoprise.com/saml/sso/[key]. Depending on the browser and how you’re signed into your domain, you should be able to sign right in.
Automatic Conversion
If you have users that you’ve previously invited to your CloudReady tenant and they then sign in via the SSO URL, they will automatically be converted to use the Single Sign-On in the future (federated). Their managed login will no longer work after this and they, of course, won’t be able to manage their own password through CloudReady. There is one exception to this conversion/federation and that is for users that are in the Owner Role within CloudReady. For users that are the Owner of the CloudReady tenant, we leave both the managed login and Single Sign-In working in case there is a problem with the SSO and it needs to be reset.
Explicit SSO Login
You can also use the explicit Single Sign-On URL and your AD Compatible UPN for signing in provided you’ve already converted your account to use SSO within the CloudReady system. To do, go to https://secure.exoprise.com and click the ‘Use Single Sign-On’ link, then enter your email address and if its an account that has been converted to use SAML, it will redirect to your IdP sign-in URL for your tenant and configuration.
Updated Management Client
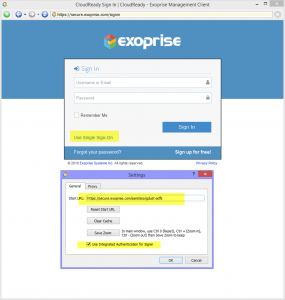
Exoprise also updated the management client to support integrated authorization. Once you’ve federated your account, through an invitation sign-in or via the ‘Use Single Sign-On’ link, the client will automatically set the right starting URL within the Management Client and you shouldn’t have to enter credentials anymore. Click to open the image and see details of how the starting URL has been reconfigured.
Contact Us With Further Questions
If you have questions about additional features or need assistance with an alternative Identity Provide, contact support@exoprise.com for help.

